PANORAMAS AND PHOTO TECHNOLOGY FROM ICELAND AND GREENLAND
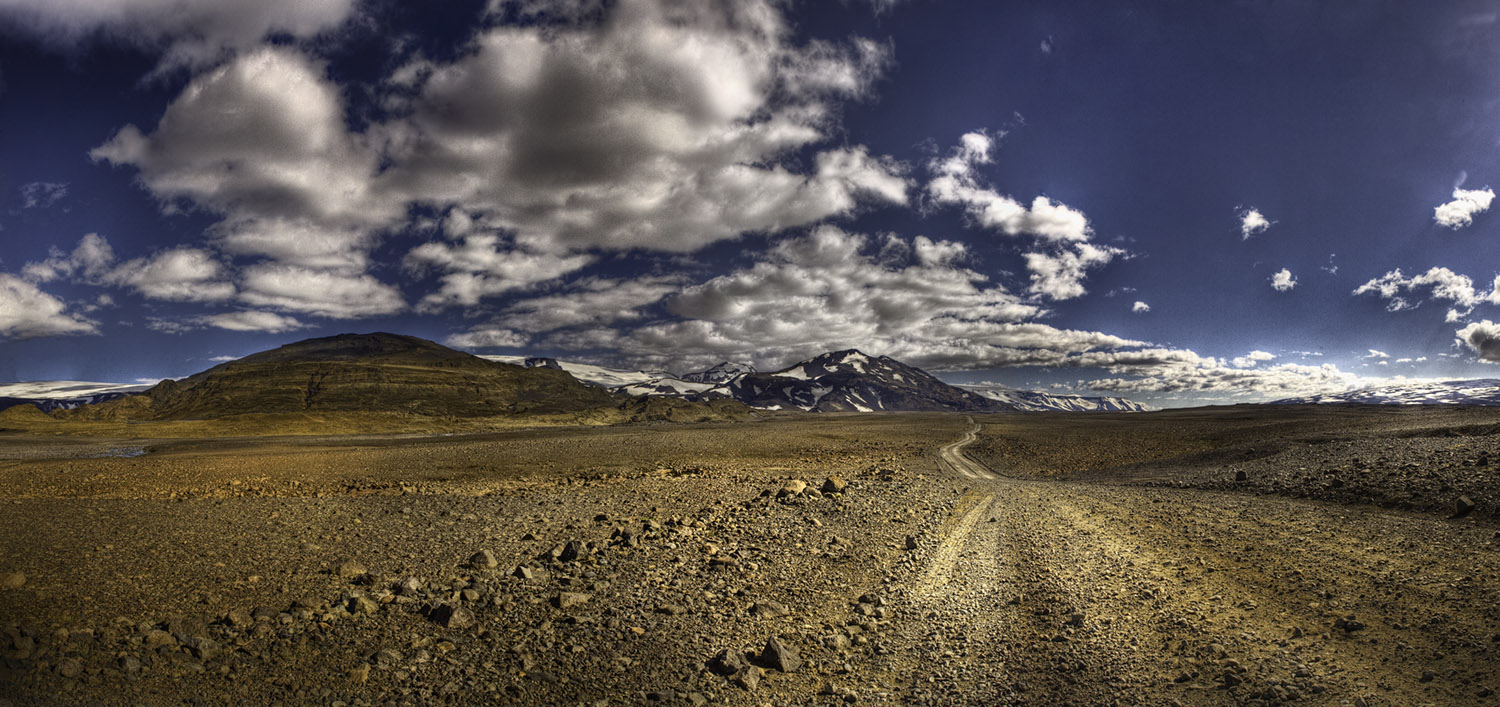
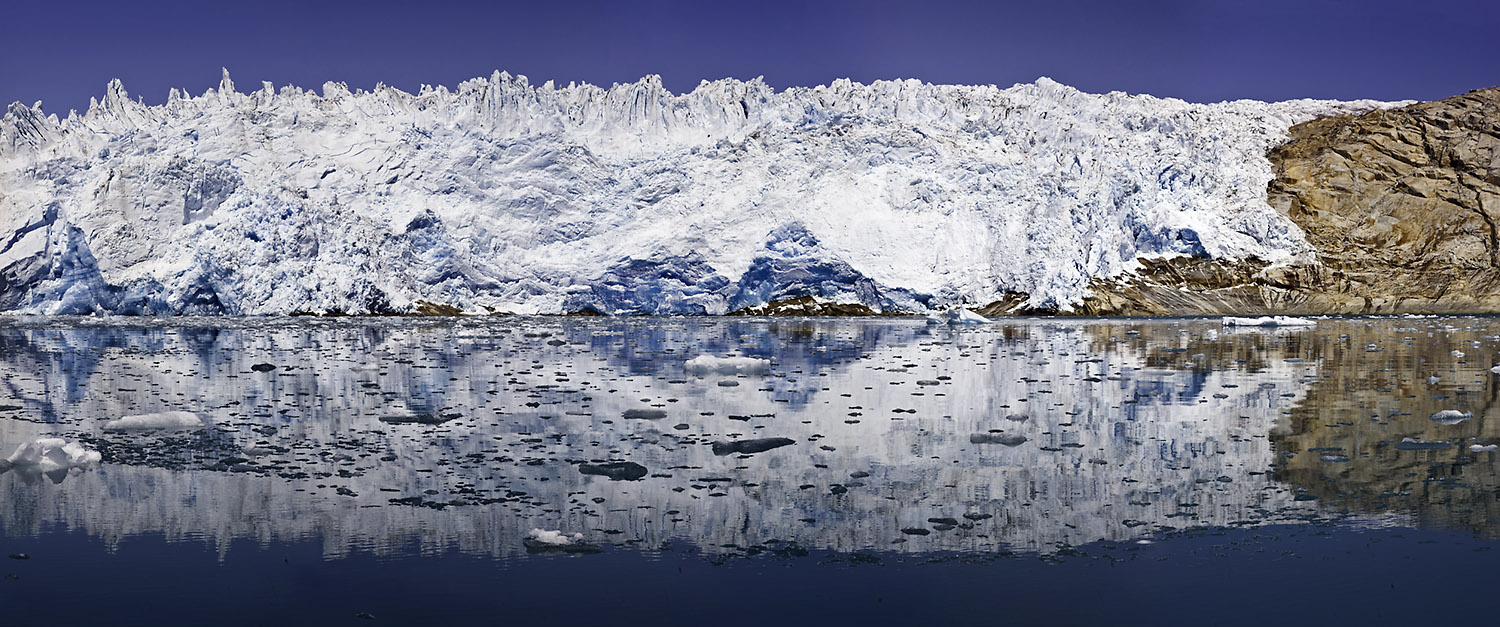
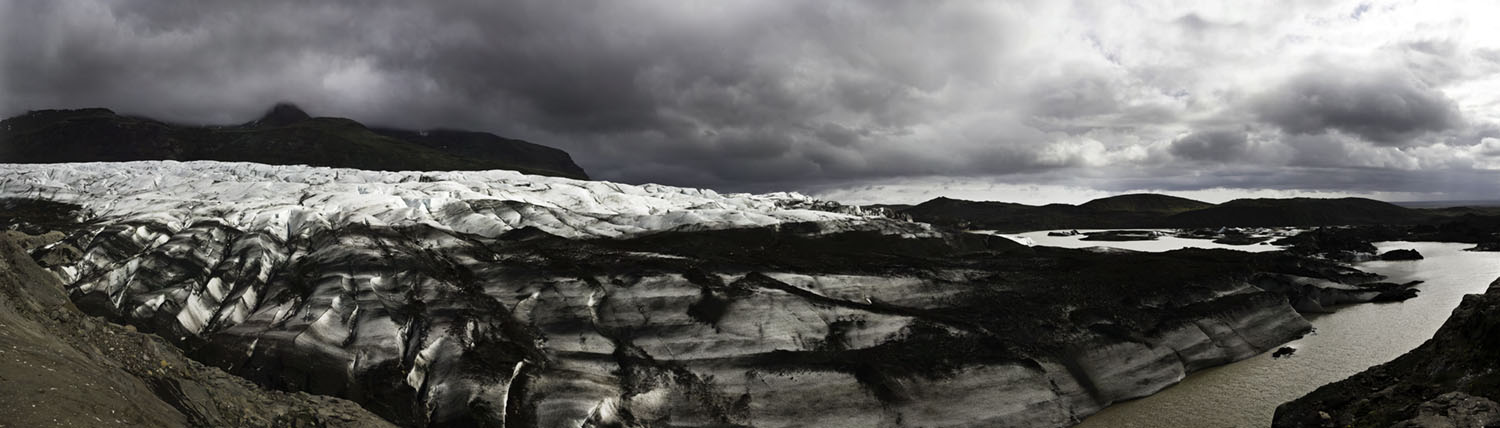
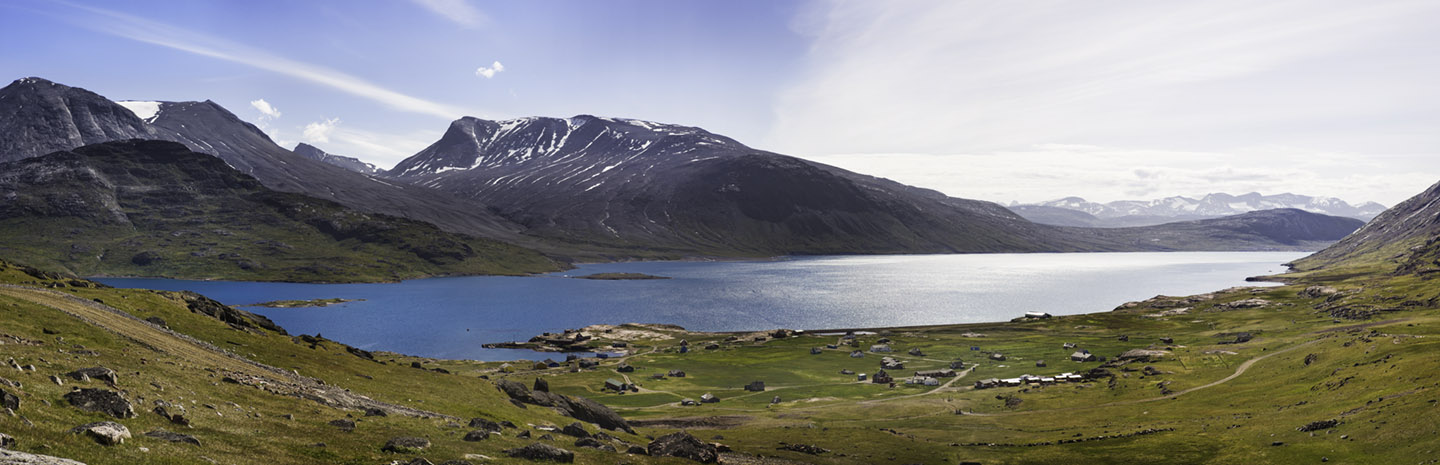
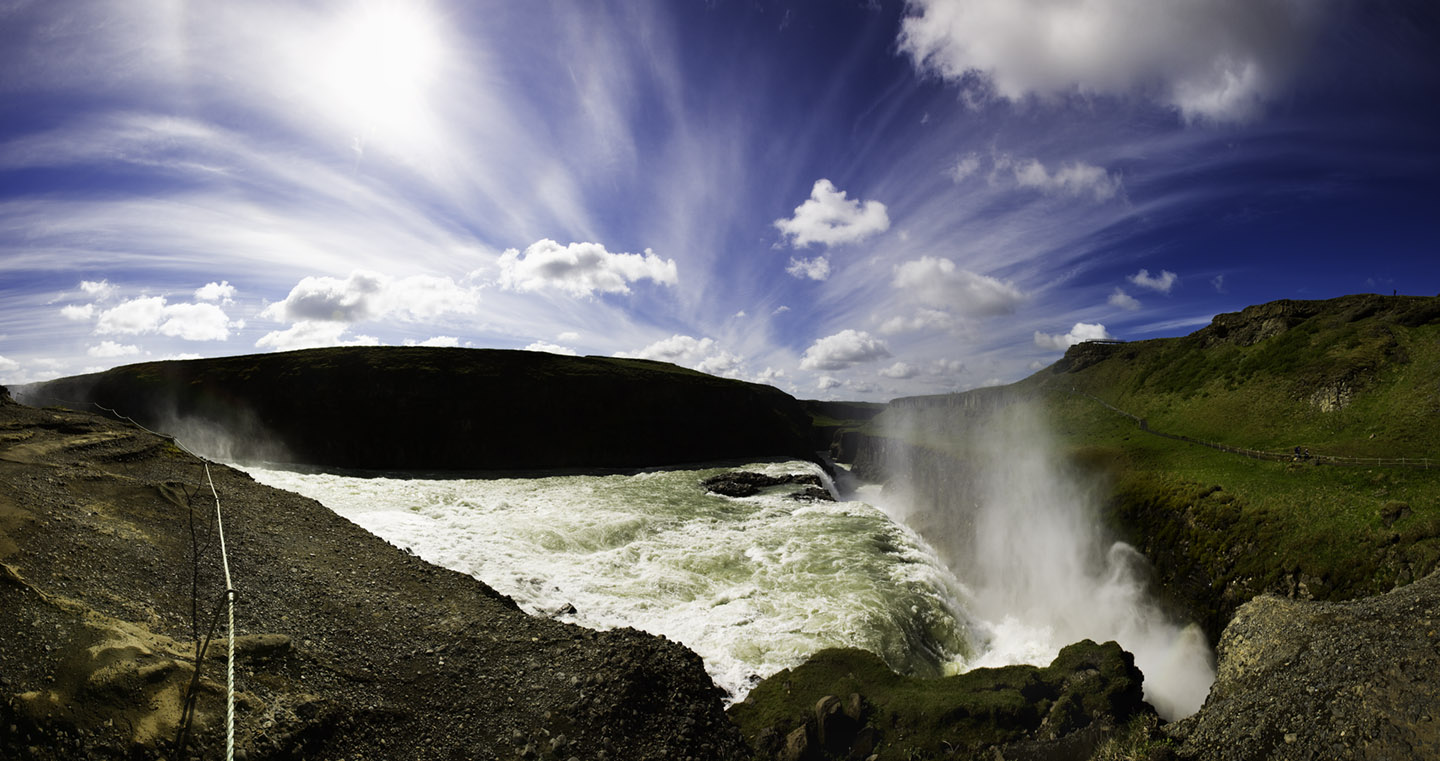
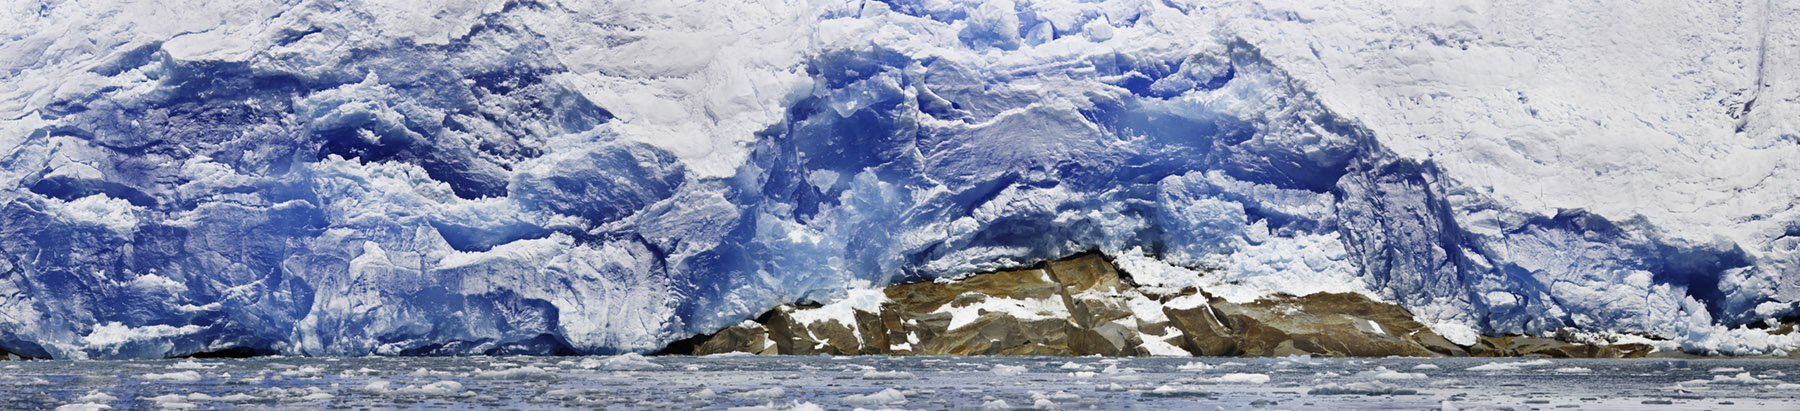
The previous messages about my Iceland/Greenland trip were about conventional pictures. (See below). This feature contains some panoramic shots that are created by stitching together multiple frames into one picture. These were mostly taken during my recent trip to Iceland and Greenland. Click on the images to enlarge.

Click on images to enlarge
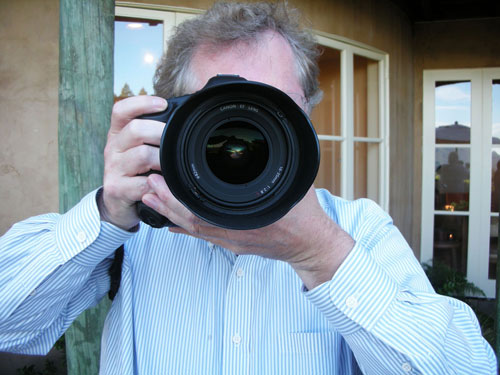
A very frequent question that I got from the previous emails is "what equipment do you use?", or "you must have a great camera". Whenever I hear that I smile and think yes I do have great equipment, but there is a bit more to it than that. A small amount of the "more to it" is me, the rest is a complex mixture of software and hardware. If all you care about is looking at the pictures, you can skip the rest of the text! But, if you are interested in the technology behind the picture making, read on. (For a printable text-only file, click here.)
For most pictures I use a Canon EOS 1Ds Mark III camera—this has 21 megapixels, so it is pretty serious, but it's not the biggest out there. Digital backs for medium format cameras have up to 45 megapixels. They are also about 4X more expensive for 2X the number of pixels, but that underestimates the total difference. They are much more cumbersome—both heavier (not that my camera is light!) and bulkier. There are fewer lenses available. The battery life isn't great, and neither is the ISO range. These cameras are really made to be used in a studio, where you can give them plenty of light, tether them to a computer, use an AC power supply and so forth. Under ideal circumstances the quality is definitely be higher than my camera, but those ideal cases are rare. Net-net the tradeoffs argue for the Canon, at least for me.

In addition to having lots of pixels, each pixel is big in terms of bits. On my camera each pixel has 42 bits (14 bits each for Red, Green, Blue), whereas most low end digital cameras have 24 bits/pixel. The extra bits give much smoother gradations of color, and reduce digital "noise" that can occur in shadow areas, especially at high ISO (when there is not much light).
Noise in digital photography is a bit like grain in film—but has some differences. Digital noise comes from errors in the camera reading the image sensor. Each pixel on the sensor is a tiny bucket—in the case of my camera they about 5 microns across (5 millionths of a meter). Each bucket catches photons (particles of light) and turns them into electrons, which are then counted to tell the camera how much light hit that pixel. Noise happens because there are some errors in both the collecting and counting process. Bright parts of the picture have high numerical values—in a standard 24 bit/pixel image, each component R, G, B has 8 bits. So a pure white pixel is 255,255,255 and pure black is 0, 0, 0. Noise is like a small number which is added or subtracted from each pixel. At low ISO the variation is small, say +- 2. At high ISO it is like adding +-10 or more.
Noise tends to be a constant amount rather than a percentage. You can see how this will affect the dark regions of the photo more. +- 10 is a big deal in a dark area where the numbers are 10, 10, 10. It is percentage wise much less important to add +- 10 to 200, 200, 200 than to 10, 10, 10. This is also why it is better to have 42 bits per component than 24—in the 42 bit case white is 16384, 16384, 16384, and the noise matters much less +- 10 is less noticeable. These differences become even more pronounced when you adjust the tones in Photoshop.
The camera is matched with a set of Canon lenses. Most of the pictures in Iceland and Greenland were taken with a 24-70mm f/2.8 zoom lens, or a 300 mm f/2.8 telephoto, although I had other lenses down to 16mm and up to 600mm. The lenses are the most expensive part of the equipment—many times more in aggregate than the camera bodies. In the digital era, the lenses are also the permanent part. Three years from now I will almost certainly have a new model digital camera, with lots of features (just as I will likely be typing on a new computer by then), however I will almost certainly be using the same lenses.

These days software is just as important as hardware—indeed more so if you ask me. The raw images from the camera must be converted from 42 bits/pixel to 48 bits/pixel using "raw conversion" software. I use either Adobe Camera Raw (bundled with Photoshop), or when the image is really important or difficult, DXO, a very sophisticated raw converter from France. Raw conversion is to modern digital photography what developing was in the analog era. The reason it exists is that mathematical algorithms for signal processing need to be run over the raw sensor data. The camera does this, but the amount of processing power and memory in the camera is limited. A PC has a processor that is vastly more powerful than the chips in the camera, and that extra power can be spent running more sophisticated algorithms to improve the picture quality. Good raw conversion can take five minutes per picture on a high end multiprocessor PC—that is far more time than you'd tolerate inside the camera.
After raw conversion comes adjustment in Photoshop. Lots of people have asked me "do you use Photoshop?" and when I say that I do there is often a comment like "oh, that explains why the pictures look good" as if it was easy to use Photoshop to make any picture look good. Just try it!

Every serious digital photographer uses Photoshop routinely, but typically only for small tweaks. The first Photoshop task is dust spot removal. Remember those electrons sitting in tiny buckets on the sensor? Well they give the sensor a charge—it is static electricity. So for the same reason that static electricity can attract lint and dust to your clothes, they can attract dust to the sensor where it makes black spots on the picture. This particularly occurs when you change lenses. Indeed in dusty places like Africa I try to never change lenses while out in the field.
Dust is such a problem that my current camera has an automatic sensor cleaning feature—the entire sensor is shaken at ultrasonic frequencies to throw the dust off. This occurs every time you change lenses. It isn't perfect, but it does help with dust. I usually try to shoot a few frames of plain sky every day or so, so I can look for dust spots. If the automatic method fails, the best way to remove them is an amazing brush from Canada called the Arctic Butterfly. Just prior to use, you press a button and a motor spins the brush through the air at high speed. This gives it a static electric charge which then out-competes the sensor cling. But you don't want to do this too often—if you accidentally scratch the sensor, you've just destroyed the most expensive part of a $9000 camera. It's also a part you can't easily replace in a small fishing village in Greenland. So I try to be very careful about sensor cleaning.
When all else fails and dust spots are on your picture, you a Photoshop feature called "healing brush" gets rid of them. You center a circular cursor over the dust spot and click, and it just disappears. After dust spotting is color adjustment. Human eyes have an amazing system of automatically adjusting to both the brightness and color of a scene. That is why ordinary incandescent light bulbs work—the light is actually quite orange if you measure it, yet our eyes are happy to adapt and see the light as white. Not so with camera sensors, which tend to see the world quite objectively. Every digital picture must be adjusted for the "white balance"—the definition of what is supposed to look white. Digital cameras have some automatic ways to do this, but they are not perfect, so it almost always needs a little tweak.
Dynamic range is the term for the difference between the lightest part of the picture, and the darkest. A typical outdoor scene can have a ratio of light to dark of 4000:1—the bright parts are 4000X brighter than the dark parts, but scenes can easily go higher than that, up to 1,000,000: 1 if you have a dark shadow in one corner and the sun itself in another. Human eyes have an automatic system that compensates for this, allowing us to see both the bright highlights and the dark shadows simultaneously. Not so with cameras. Analog color film typically has a dynamic range of 32:1, or 5 f-stops (one f-stop difference is a factor of 2 in illumination). Digital cameras are a little bit better at about 6 to maybe 7 f-stops, or 64:1 to 128:1, or maybe a little more. A lot of the problem of picture taking is how to stuff 4000:1 dynamic range into the much smaller range of the sensor. This is why photos taken in bright sun can either have pure white, washed out bright areas (if you expose for the shadows), or good highlights, but inky black shadows if you expose in the other direction. There is no way to get both the bright and dark parts to look like they do to your eyes.
Just to make life difficult, natural scenes can also have very flat illumination, with low ratios of light to dark, that are much less than the film or sensor can record. In that case the task is how to breathe life into flat dull lighting. So, sometimes you are trying to stuff 12 f-stops of range into a 6-stop sensor, while for other pictures you're boosting a dull 3-stop scene into larger range. The fundamental reason for all of this is that our eyes do such a good job of automatic adjustment, and cameras don't. One day they will, but I'm taking pictures now.
After taking the photo, we then make a print, or an image on a computer screen. Those output media also have a dynamic range—which is even more limited. A typical matte print has a dynamic range of 50:1. A glossy print can have up to 256:1, but only for some angles, otherwise reflections overwhelm the dark parts. The low dynamic range of photo print is pretty obvious—otherwise you'd get sunburned by a photo of the sun! The amazing thing about photography is that despite these limitations, you can create a psychological impression of a bright desert sun even though the camera, and the output media have vastly smaller optical dynamic range than the original. Photographers create compelling images by matching our intuitive notion of what scenes ought to look like; bridging the gap between what our visual system remembers and the far more objective sensor and output media record.

There are many photographer's tricks in coping with this. One is to choose your lighting to avoid the problem, but this only goes so far. Another is to use flash, or reflectors to add light to the dark parts or subtract from the bright parts. That is what a studio photographer does. The primary tool for dealing with dynamic range is careful adjustment of the contrast and brightness of the image. Ansel Adams was a pioneer of using careful development of analog film, and good print making to do this—he called it the "zone system". I used the zone system as a kid—it was very complicated, but it allowed you to decide at the time you took the picture which parts you'd make light and dark. These days one achieves similar results with a Photoshop feature called Curves, which directly controls the mapping between what the sensor sees and the final picture. Curves does this globally for the picture, which is nice and simple, and usually works very well. About 90% of my pictures are done at this stage—dust spotting, color adjustment and curves are all they need.
Ansel would be thrilled with this—he was a photo geek that was totally into the technology of his day—but he would almost certainly do more. The next stage after Curves is to make local adjustments. In the old analog darkroom this was called burning and dodging. You would stand in the dark under the enlarger and give extra light to some parts of the picture (making them darker), and block light from other areas. It took some patience to learn this, but master printmakers could do some amazing things. Today Photoshop has a dozen ways to do the equivalent of burning and dodging, with the great advantage that you don't do it in the dark, and even better you always have an Undo command handy. I rarely dodge and burn on my photos, but sometimes it works very well.
This is the basics of imaging software, but there are lots of details. Hundreds of small software companies make packages that assist with various tasks. Downloader Pro, from the UK helps me download my pictures from memory cards. Focus Magic, from New Zealand helps with sharpening detail, as does Focal Blade from Germany. Neat Image from Russia helps filter noise. Fred Miranda, a male model in Brazil (I am not making this up!) writes Photoshop actions that he sells over the Internet for automating common tasks. One of the many benefits of the Internet is that one can discover and purchase software from all over the world. Some of this software is stand-alone, some is plug-ins for Photoshop. Only rarely is this software open source or freeware; the majority is for-profit paid software from small companies, or individuals. Sometimes it is a hobby business or sideline, but a lot of these people make a living writing and selling this imaging software over the Internet. One can argue whether it takes a village to make a child, as Hillary famously said. It definitely takes software from a whole world full of geeks to make a state of the art photo.
All of the above is the standard for normal images, but there are a set of much more exotic things that can be done using multiple pictures. The basic idea here is very simple—overcome the limitations of a single photo by taking multiple pictures and somehow getting the best of them. This works well, but it gets complicated in a hurry.
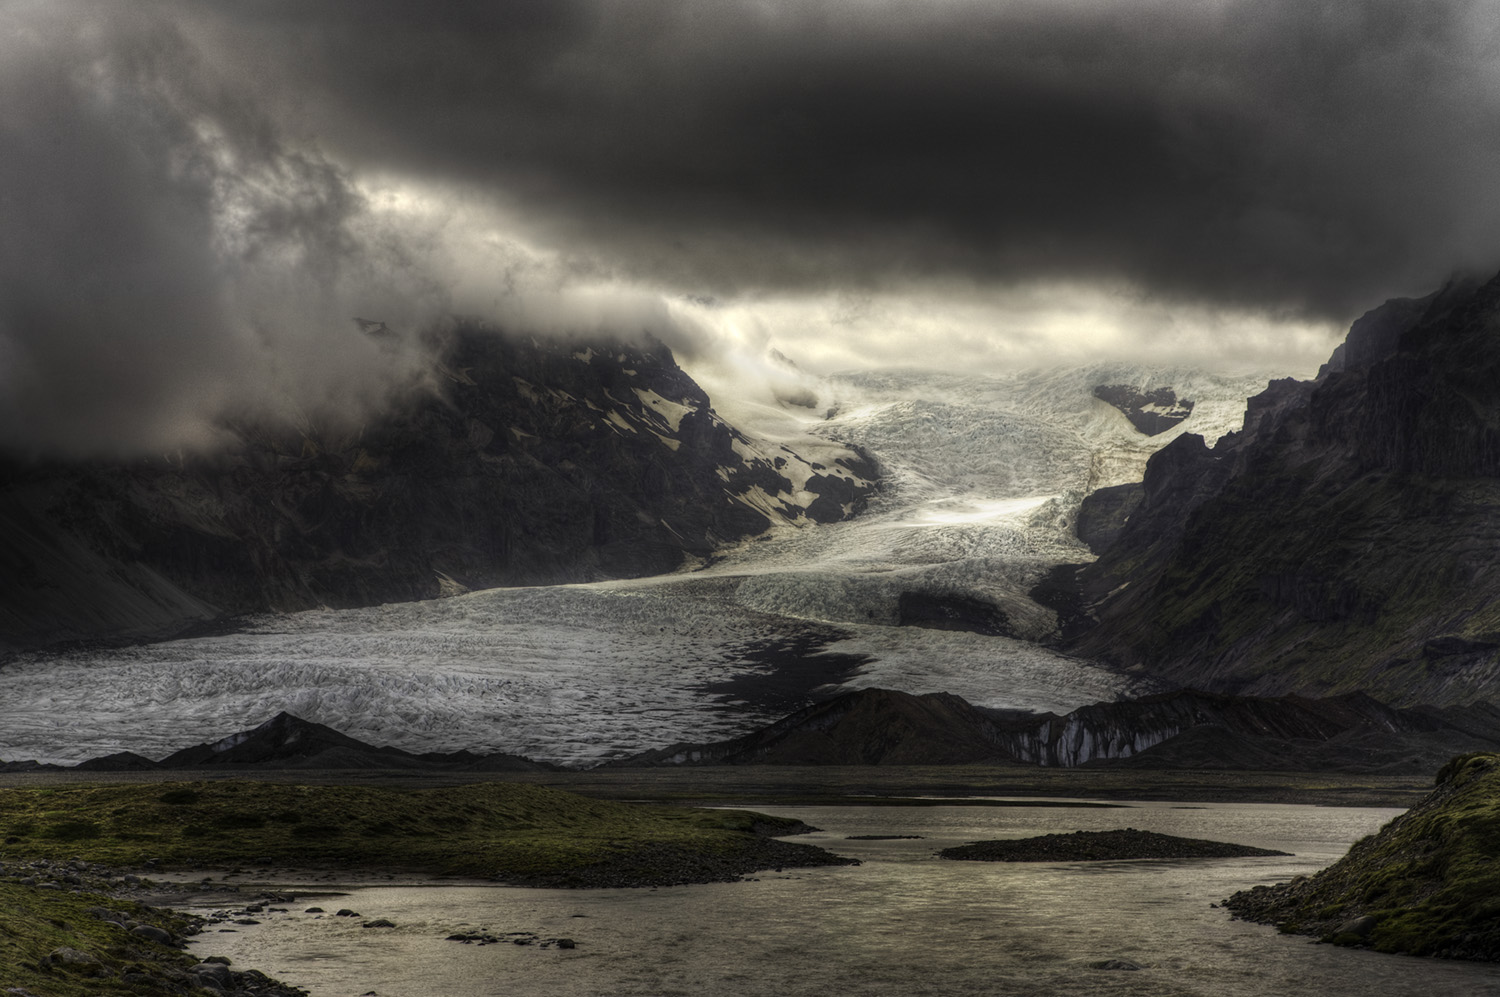
One way to solve the dynamic range problem is to take multiple pictures at different exposures. So, if you have 12 f-stops of dynamic range, put your camera on a tripod and take several pictures (as few as 3, but I usually do 7) at different exposure settings. Some of these will have the shadow detail, but the highlights will be washed out white. Other shots will have the highlights properly exposed but the shadows will be pure black. You then use software to combine the multiple imagines into a High Dynamic Range image. HDR images have 32 bits per component, or 96 bits per pixel, so they are very large. Each component is a floating point number, so it can store enormous gigantic dynamic range—more than exists on Earth. I have been experimenting with HDR for years, but more recently it came into the mainstream because Photoshop started to support it—prior to this you had to write your own software. These days it is far more common.
There are two challenges for HDR—the first is taking the pictures. Since you are taking multiple shots of each scene nothing can change; this is not a technique for moving subjects. The second challenge is how to go from the HDR representation to a print—this is a process called tone mapping. The human eye has a very sophisticated algorithm for tone mapping—unfortunately we don't have anything quite that good yet. So it is very easy to use tone mapping to create a picture that looks weird and unnatural. I don't use HDR very much, and when I do, I try to be very subtle about it—but there are a couple images included here that use it, one of them is not quite as subtle as I would like. I'll let you guess as to which photos enclosed here are HDR. Eventually better algorithms will let me re-make these HDR photos as better versions that exist here.
Imagine telling Ansel wait for new algorithms, so your pictures can improve. It's a very different world today.
The next multiple shot technique is noise reduction, and resolution enhancement. A program called PhotoAcute can take multiple pictures of the same scene (again, a tripod is needed) and put them together to reduce noise and increase resolution. Elementary statistics tells you that random noise ought to drop as the square root of the number of images, so 4 shots put together gives you half the noise. That is just simple averaging, but there are much more complicated algorithms that PhotoAcute uses to extract more resolution—up to about four times as many equivalent pixels as much with enough shots (typically 6 to 9). Since I am already starting with 21 megapixels, I don't need this often. I usually make prints up to 28 x 42 inches without any noise or grain from a 21 megapixel image. PhotoAcute is mainly interesting for going bigger than this.
Yet another multiple shot approach involves focus. If one part of the image is in focus, other parts may not be. The range of distance which is in focus is called the depth of field. It is often distressing to find that your depth of field is smaller than you would like. One approach is to "stop down" the lens, going down to f/16 or f/22, but this hurts the resolution of the photo (due to diffraction, but that is another story...). Shallow depth of field is particularly problem for telephoto shots, or extreme close up or macro shots, where even f/22 is not enough. Once again there is a multiple shot technique—you take multiple photos at different focal distances and then software called Helicon Focus (written by a guy in Ukraine) that puts them together semi-automatically into one shot that is perfectly in focus.
I use this technique a lot for microscope and macro shots, but sometimes do it for landscapes. None of the pictures from Iceland or Greenland use focus stacking, so to illustrate the technique I enclosed a macro shot of some blueberries, and a microscope shot of veins in a leaf. These pictures can often combine more than a hundred individual shots. Without focus stacking only a tiny amount of each picture would be in focus. I cobbled together a software controlled robotic stand to do this, and similarly automated my microscope, writing software to control them—this is beyond the fringe of what is commercially available.

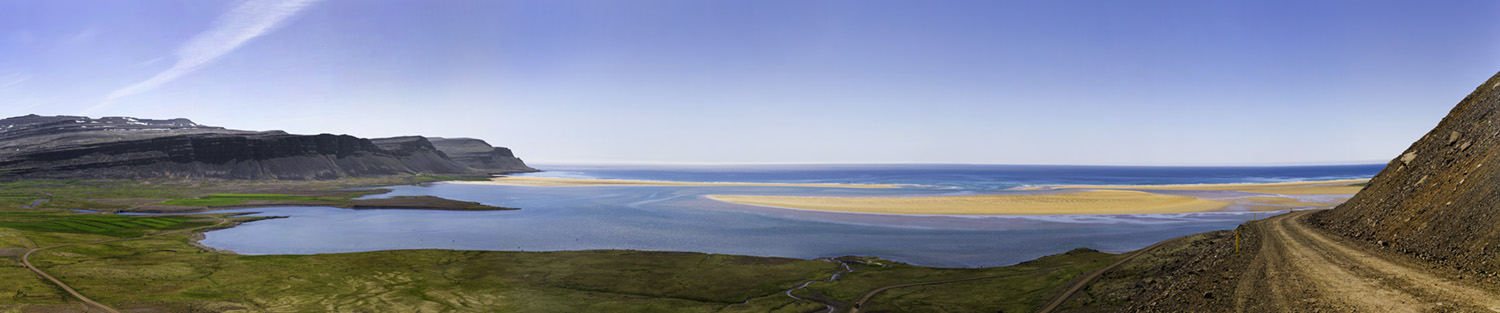
The final multiple shot technique is panoramic photography. A conventional camera (analog or digital) has a ratio of width to height (called the aspect ratio) of 3:2, which is equivalent to 1.5:1. Old style TV screens and computer screens are 4:3 (or 1.33:1), and the newer HDTV screens are 16:9, which are a little bit less than 2:1, while the widest screens in a movie theater are typically a bit wider at 2.35: 1. Panoramic photography comes when you get an aspect ratio of 3:1—the picture is three times wider than it is tall, and they go up from there. Psychologically pictures just seem to look different when the aspect ratio is 3:1 or wider because it is harder to see the picture in one glance. That might sound like it is unfriendly to the user, but in fact this is exactly what reality does—our field of view is very wide, and our eyes dart around it to take it in. One of the reasons for wide panoramas is that we have two eyes, set side by side—if our eyes were over/under instead the field of view would be quite different.
One way to get a panoramic picture is to take a regular picture then cut off (crop) the top and bottom. You can do that, but you wind up losing resolution—you can't make a very big picture that way. In the old analog days people made cameras with special lenses that exposed very wide pieces of film. I have lots of these. The smallest is a Hasselblad X-pan that was basically a stretch-limo version of a 35mm rangefinder (like a Leica). It shot super wide pictures on a 35mm film (21 wide shots on what would normally be a 36 exposure roll). My largest is a special Korona view camera (the old fashioned kind with leather bellows) that takes special sheet film that is 8 inches x 20 inches. These days I tend to take panoramas digitally by stitching—the digital technology is just so superior to film.
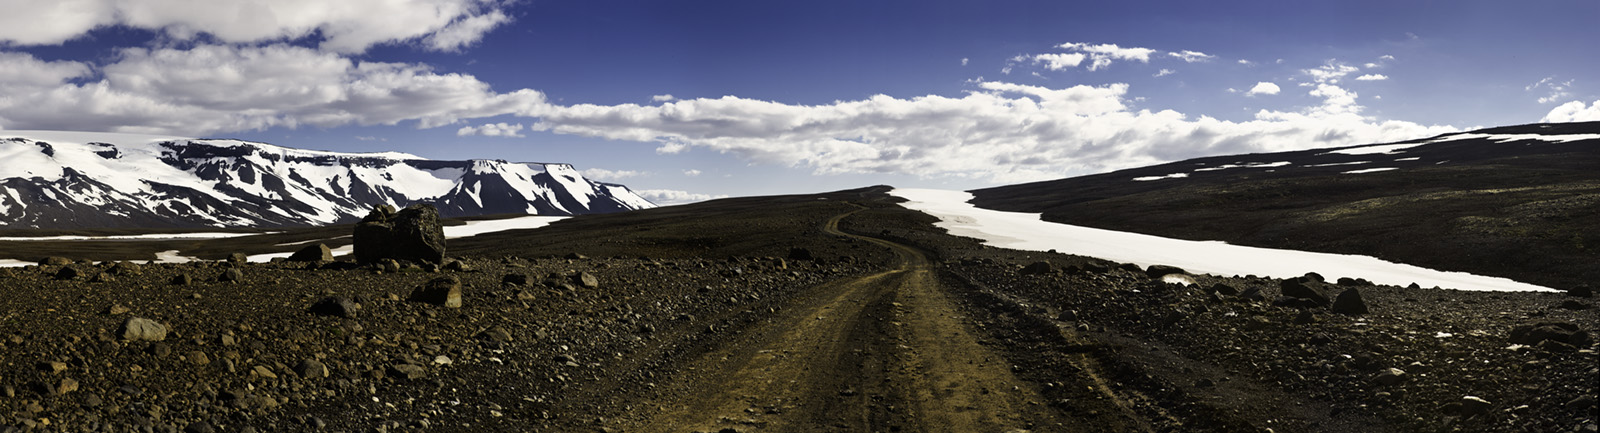
To do this, you generally start with a tripod with a special head which lets you index the photos accurately. You then take a pile of pictures, each with the camera pointed in a slightly different direction. The pictures are coventional 35mm aspect ratio, but are set vertically (i.e. "portrait" rather than "landscape") because that puts the most pixels vertically. Once again software comes into play—I use a high end stitching program called RealViz Sticher Pro (another French software product), but there are many others. Stitching software takes the multiple pictures and puts them together into one super large image. I frequently will combine 10 or 12 pictures to create a single image with 200 to 400 megapixels. The process takes a long time—hours for a very large shot—because it is very computationally intensive.
Like the other techniques, stitched panoramas have an issue with movement—if the subject moves while you are taking the multiple photos you have a problem. In the Falkland Islands last year an enterprising penguin moved fast enough between shots that he appears twice in one picture. You also need to be careful about wide angle distortion. Most of my panoramas are shot with lens that is slightly telephoto —usually 70 mm focal length—but the total effect of putting them together creates the same sort of wide angle effect you would get from a super wide lens. In other shots I use a wide angle lens down to 24 mm, creating a super-wide panorama that is the equivalent of a fisheye lens or better, taking in more than 180 degrees of the scene. The wider the field of view, the more distortion—this is just a reality of geometry. Mathematically this is similar to the problem of a map projection—just as a Mercator projection map distorts some areas more than others when you go from a round earth to a flat map, very wide panoramic shots get some curvilinear distortion. And, as with maps, there are different ways to deal with it. Sometimes this looks cool and is intrinsic to what the picture is about, sometimes it's a distraction.
I was amused to see a recent article in the NY Times about a robotic panorama head that is due on the market in a year or so which helps automate the tedious process of taking all of those pictures. That is one approach. At the other extreme, I have gotten pretty good at shooting panoramas freehand. You have to be very careful to keep the camera very level, and to have enough overlap between the shots that the software can figure out how to put the images together. Several of the panoramas in this email were shot this way, including one shot freehand while standing on a moving boat.
Finally, just to make this extra complicated, you can do all of these things simultaneously. A number of the shots here are HDR panoramas—in one case I used 12 different directions, taking 7 shots in each direction. So, 84 separate images were combined to make one final picture. HDR is pretty important to panoramas because across a very wide field of view it is quite likely that you'll get a high dynamic range. If I wanted to, I could use Helicon Focus and shoot 10 different focal distances for each of these and make it even more extreme.
As you can imagine, this gets very time consuming. That's why I am sending these shots out weeks after I got back from the trip. I also have to confess to having some help—Ryan Smith spent a lot of time wrangling the software on my behalf because my day job keeps getting in the way of my photography.
Once you have a panoramic picture the challenge then becomes how to print it. I've been planning for months to make a set of panoramic prints, but they are some real issues. I bought a great new HP photo printer that uses 44 inch wide paper. The paper comes in long rolls, and one of the main reasons I bought the printer was to make panoramic prints that are 44" high by up to 20 feet long. Logistically it is hard to make, dry and mount prints that size. It took a while to find a framer that could custom make frames that big—20 feet just isn't a standard. Then the walls needed to be reinforced to mount the frames. It is very easy to damage a large print in mounting it, so we decided to make the prints "just in time"—we would get the frame made, and mounted. Then when everything was ready we would make the print at the last minute, dry it overnight, then have an expert art conservator hinge it into the frame. We got all ready, and Ryan started to make the first print—16 feet long.
It didn't work. We discovered that the HP device driver for the printer has a serious bug for prints more than 108 inches long. It's my karmic burden—live by software, die by software. That was three months ago. While we struggle with workarounds, and talk fruitlessly with HP tech support, gigantic empty frames grace the hallways of my company—it's all rather comical. Passersby must think that they are some sort of minimalist art.
Anyway, this is the last photographic installment for a while — my day job and other responsibilities beckon and it will be a while before I have a chance to take more photos.
-Nathan
Photos copyright © 2008 by Nathan Myhrvold. All rights reserved.
